Showing posts with label our home. Show all posts

Sunday, October 24, 2010

The Boys' Room, Part I

So, the shell of the boys' room is finished-- what a project!

There are a few more details to add--3/4 round at the baseboards, cleanign up some slips around the window trim, perhaps some crown moulding, but the walls, trim and floor are finito.  And luckily, I really, really still like the colors.  My "custom" mix on the walls was colormatched in porch paint for the floors.  The trim is another "custom" mix-- some more mis-tint in a shade of blue-grey mixed with "Slipstream" from Martha, which looked too blue on its own.

I learned some things about painting floors-- hopefully I'll be an expert soon, because I have two more rooms, a hallway and a staircase to go...
Here are some tidbits I learned about painting wooden floors-- you really should give it a try.  Whole lotta bang for your buck, for sure.
* Start with a room that you don't use frequently.  I felt a lot of pressure to get this job finished since my boys (and all their stuff) were bunking in the guest room while I painted.  I cut a few corners along the way, but, being me, I couldn't stand it and then went back to fix them, taking twice as much time as slow and steady would have taken in the first place.  I wish I'd exercised my learning curve on the guest room, instead, to take my time and get the hang of things.
* I used a semi-gloss porch paint with a coat of poly on top.  It's pretty slippery, but already feels like it's getting some "grip" as we walk (and run!) on it.  With two active boys, I think the poly really is a must-do, but for a less-traveled space, a high-gloss porch paint probably would have been fine. 
*I used Verithane, which is supposed to dry completely clear.  On our floors, which are around 70 years old, and a little uneven, it apparently slid and pooled a bit, leaving a few yellow patches that need to be sanded down and re-coated.  If you are painting an old floor (and how many folks contemplating painting a wood floor are living in brand-spanking-new home?),you may want to weigh your type-A tendancies versus your desire to see your family some time in the next decade...
* A final note--painting floors in a home with pets will tax even the most laid-back home improver.  We have a (big, black, medium-coat) dog, and despite multiple vaccuumes, sweeps, and swipes with baby wipes prior to painting, there are more than a few dog hairs on that floor.  I have to say that by the time I painted myself out the door after each coat, I was more than a little frustrated.  So, there you have it, and do with it what you will...

As for me and my house-- well, we will paint the floors.

Tuesday, October 5, 2010

Bottle trees!

One of our neighbor's has a really great concrete goose in their front yard-- she? he? (there's some discussion around here about the gender of the beast) changes clothes to mark changes in the weather, super-special sporting events, or to celebrate the holidays.  We visit the goose a lot. 

And then a few months ago, something beautiful appeared next to the goose.  Wrapped in white lights, adorned with blue glass bottles-- it was lovely.  And then another appeared.  And then one next door.  And another down the street-- and another, and another, until we started to feel like the only kids not sitting at the cool lunch table.  Because that's what being the only folks in Westerwood without a bottle tree feels like.


And so we bought one. 


The little keyhole in my perennial garden looks like it was made for it-- and it balances out our Jake art on the other side of the yard so well. 

Best part-- 100% of proceeds go to support the Juvenile Diabetes Foundation. 

Pretty cool, huh?

Tuesday, September 28, 2010

Cleaning up the studio...

While diging through the piles (and PILES-- it's amazing what happenes when you have a room-full of built-ins and no natural tendancies towards neatness...) in the studio I've come across so many interesting things.  Fabrics I'd forgotten about.  The (blush!) scrap bag winners scrap bags packed and ready to ship.  (I'm mortified about this!  I promise I'll make it up to you when I get them in the mail...) And little bits of embroidery, crafted here and there and tucked away for later.

It's later, and the baby in his big cloth diaper is running the risk of going starkers if I don't find some pants to fit him.  Like, yesterday.  And so I've been taking a few minutes a day to make a few new pairs of britches for my boy.  I'm perfecting the perfect, and perfectly simple, toddler pants pattern, and hope to have it to share with you later this week.  Half-a-yard + twenty minutes= pants.  Really.

But for now, isn't this little orange beach cruiser so sweet?  My favorite boy-stripe ever on the pocket flap, and a little rust-colored top-stitching--perfection! 

Monday, September 20, 2010

A vingette, styled by Grady

When walking through the living room the other day, I saw a little pile of stuff on our entry chest.  A pinecone-- artfully attached to the branch, and a few coasters made from thin slices of stone (found years ago, thrifting, for .50 cents per.  I saw them somehwere-- Anthro maybe?-- last year for more like $50 for a set of four.  Score me.  Yay.)

I hadn't left them there.  And then I realized that my wee stylist had struck again.  Usually his vingettes comprise various Lego incartions of dragons, boats, trains, or excavators, paired with something fun and unexpected, such as his toy stethescope and one stray, mud-stained sock.  This time, though, it seemed he might be on to something.
I neatened it up a little bit, added a lacquered, inlaid box, a couple of candlesticks, and a little bit of green from the yard. 

Here's the breakdown: lamp (thrifted, of course) was one of my favorite finds, ever--$6.  Linen shade from Tarjay, on clearance--$8.  Mirror-- thrifted, $8.  Candlesticks-- from someplace like Red Envelope, but, you guessed it, thrifted--$3 for the pair.  Vase-- well, this is just getting boring, now, isn't it--$1.  Hobnail milkglass vase, found by my sweet friend and (taller, thinner, prettier) lookalike and favorite thrifting buddy, on one of our outings, for around a buck. 

Sometimes the unexpected eye of a little child is just what the doctor ordered. 

We're quite the team, my boy and I. 

Monday, September 13, 2010

Before: The Boys' Room

Once upon a time, I was pregnant, trying to plan out life with two boys under two, and feeling just a teensy bit guilty that in a few short months, I was going to rock my big little guy's world with the advent of his new brother.  The prospect of having two cribs in the house seemed to be just.... too much.  And so we decided to plan a "big boy" room for Grady. 


Problem was, I was planning a room for my "big" boy-- all 22 months of him.  So strange to think now of how old he seemed-- John Harper still seems very much a baby to me at nearly exactly the same age.  His great loves-- planes, trains and automobiles-- were so important to him that the possibility that they would someday be obsolete was unthinkable.  And truly, who could imagine Casey (as in "at the bat") as an ever-present imaginary friend, an attraction to red clay mud that is magnetic and almost unbelievable in its proportions, or an interest in music so intense that he will spend hours listening, guitar in hand, asking me "do you feel that bass, mommy?".  Or that, upon being asked by his new and very musical teacher what his favorite song is, that he would answer "Well, I like Shane Whalen  and M. Ward, but my favorite songs are "Blue" by the Jayhawks and Tribe Called Quest "Represent, represent."  But really, who could imagine that, so I'll cut myself a little slack.
And so this room, which seemed so cute and fun for my little man, now seems so very much outgrown.  And poor John Harper's crib just rolled into the spot where a cabinet was removed-- primer on the wall, unprimed floor below.  Not much thought and love put into that.  Maybe it's because I'm a Cancer, or maybe it's just because I'm me, but gifting my family with beautiful spaces in which to live out our days is one of my ultimate expressions of love.  That, and homemade muffins in the lunchbox.  (Where's that little smileyface icon when you need it?) 

Let the priming begin.

Thursday, September 2, 2010

The Library Before and After--Part the Second

Remember when the Library was the Fireplace Room?  It looked like this:
And then it looked like this:

Different--yes.  Better--no.  A clear case of where "use what you have"= barf.

A few trips to Adelaide's, a whole lotta paint, a little fabric from Leisure, and we're looking like this:

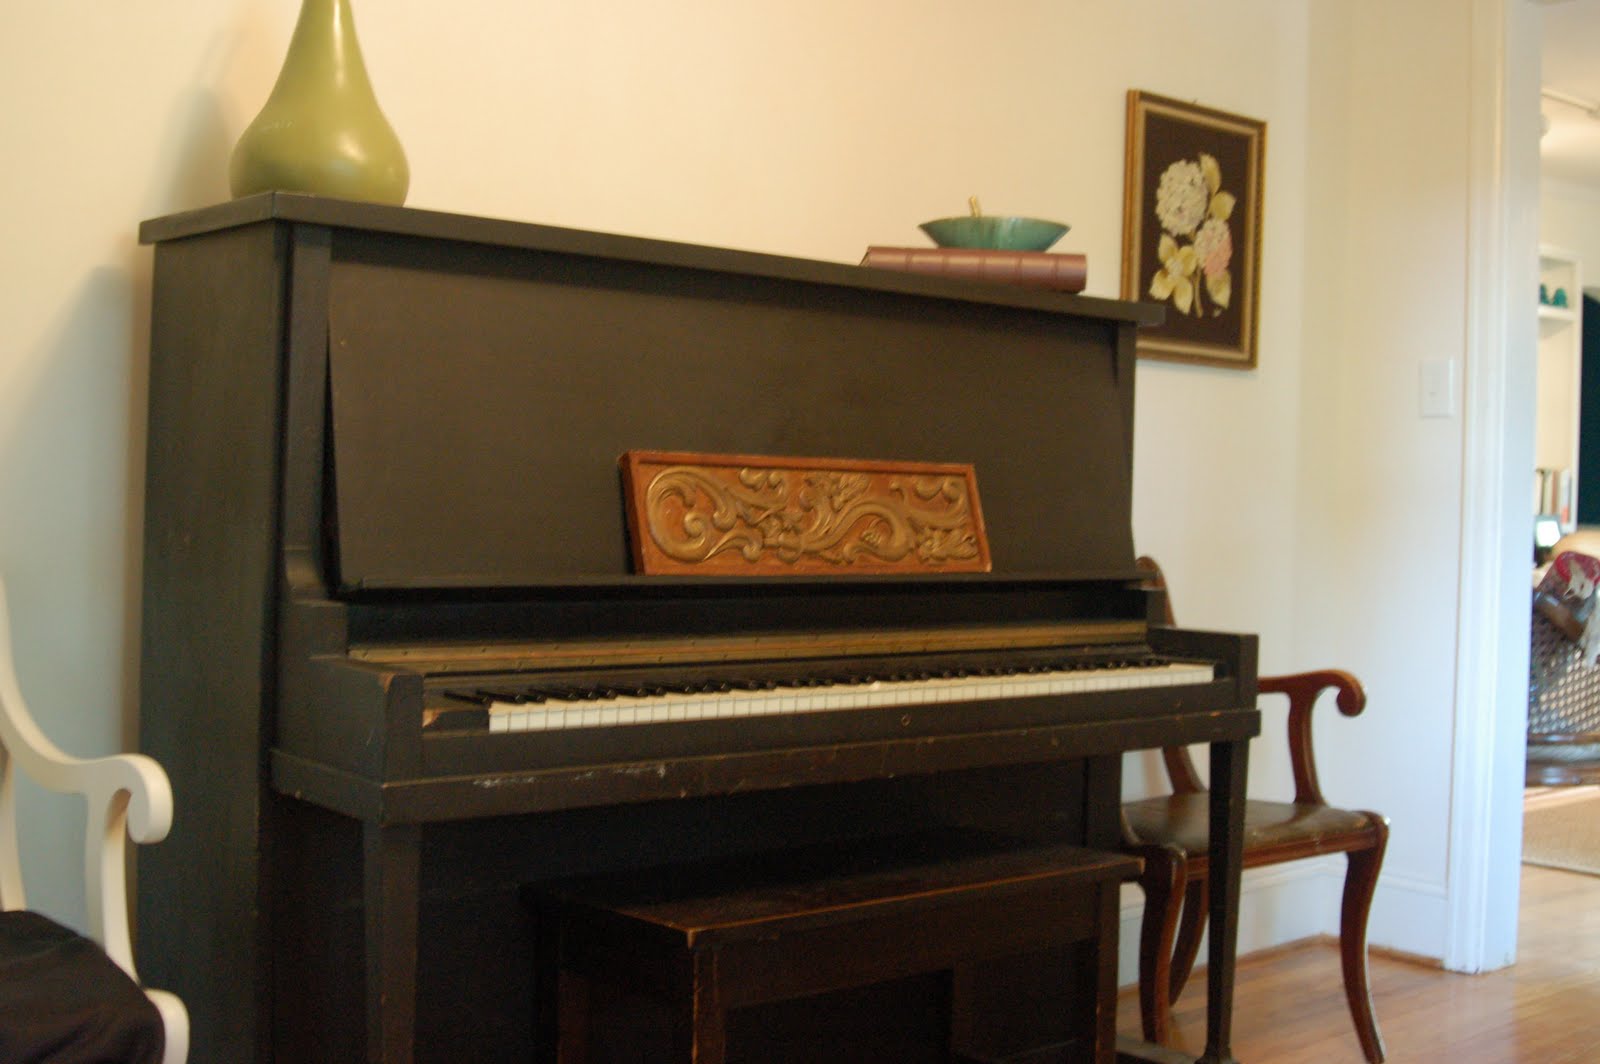
I decided that because of the piano--the one piece that absolutely couldn't leave this room because of space concerns, and absolutely couldn't be painted because of Husband concerns--that black would have to be a big part of the room. And as soon as I found my awesome chairs at Adelaide's, I knew that they would have to be cream with black upholstery-- and so black and white became the palette.  

This is still a long way from "finished"-- but it's a lot closer!  Let's take a tour, shall we?


Remember that dresser I painted for our Master Bedroom?  I rescued this huge mirror from the top, painted it black, and stuck it up there. Rounding out the mantle, we have my giant thrifted lab beakers and a thrifted pewter bowl and goblet. The candleabra was a gift from my dad.

The mirror isn't permanant--I'm really digging this mirror from Ballard-- wonder if I can knock of Suzanne Kalser on a shoestring? 
To be continued.

A little thrifted cabinet-- waiting to get a coat of black paint and some antiqued mirror for the door.  It holds our wine glasses.  Up top-- thrifted vase ($8), decanter (.50 cents) and vase ($1).  The antique barometer was my grandmother's, and the mirror came from a local antique store (it was cheap-- around $35, I think.)

The other side of the room holds the piano-- a gift from our neighbors.  It was purchased in the 1920's or 30's (right around the time our house was built) by the original owners of their home.  They were the second owners, purchasing the home in the late 1990's.  The piano rolled right on over to our house when they moved out last year.  The chairs flanking it are thrifted--$10 each.  I've painted one, and I'm waiting for Leisure to come up with a buttery black hide for me to reupholster them with-- I stuck a piece of black linen in the seat to see what it would look like.    I have something really fun planned for behind the piano-- it involves some old bifold doors that are currently "aging" in my driveway... inspired by this photo, from Velvet and Linen:


Back to the other side of the room-- the bookshelf and reading corner.  The bookshelf was a fun $48 thrifted find, and the chair is covered in a little cream linen from Leisure ($3/yard!)  (Don't worry--I fixed that wonky seat cushion! I didn't realize how wonky it was until the picture was taken.)  The large corbels on the bookshelf are from Adelaide's-- $40/pair-- a total steal.  The hanging drum shade was an experiment-- failed, I think.  The big grey wicker thing in the back was a giant basket I found at Habitat for $2.  Hubby removed the handle and I hung it on the wall-- yes?  No?  Maybe?  Side table is an old thrifting find from my grad school days-- the husband started to refinish it, then got tired of it, and left it as is.  Everything old is new again-- that finish seems to be particularly in these days... I have the MOST amazing camel saddle project in the works for an ottoman.  Hopefully coming up soon!
I made the curtains peeking out behind the chairs-- an apple green lattice from Leisure ($3/yard).  A room-size seagrass rug is on order, and the walls need a coat of paint-- something with just the teeniest hint of grey, I think.  Here's a last peek--whatcha think?

Wednesday, June 23, 2010

Guest Room: mini makeover on nearly zero dollars

So when you have houseguests for a month, you want them to be comfy.  I had big plans to get this room in tip-top shape, but between all the hurdles of the last couple of weeks, I ended up just getting the furniture in there-- unpainted-- and calling it a day.  I have to say, though, it's still mighty cozy.

I hope you have learned by now that you SHOULD be going to thrift stores and shopping on Craigslist.  This room is living proof.  We started out with just the mattress-- the bedframe is a CL find that was brass, painted nickled silver, and blogged about here.  I. Love. It.  I wish it was my bed.  The side table we had-- it's an old sewing table.  We have a gorgeous antique secretary that was a wedding gift that would be perfect here-- I've always thought it was pine, but my husband informed me that nothing that heavy is possibly pine.  It is not light.  And our stairs are not gently sloping.  Maybe he'll move it up for me, though.  The small chest was inherited from my Grandmother, and it will be getting a coat of paint at some point-- probably "Talc" from Martha's new line for Home Depot-- it's such a perfect whiteish cream.  The map was a $5 find from Adelaide's, and is destined for my boys' room, but it is large and fills up some space and I was in a hurry.  Round mirror (moderatley similiar to this one) was $10 at a resale shop-- I'm going to sand off the varnish at some point.

Pillows made by yours truly.  The linen ones are a linen/cotton blend drapery panel that I found thrifting for two bucks.  I sat with my seam ripper and 15 minutes of Sienfeld and took it apart, yielding 3 yardsx 60 inches of fabric.  Not too shabby.  I wish I'd thought to add a cute boxpleat ruffle edge-- I spied on in a phot here.  I just might go back and do it.  Ticking is from Leisure in High Point ($3/yard)-- I bought 10 yards last month and wish I had bought more-- I can use it EVERYWHERE!  Lamp is from the Salvation Army-- very similar to the one in Lauren's pad and the one Jenny's sister now has.  I have some linen in the exact same shade as the lamp to make a long pillow for the bed-- maybe this week? (ha.)  The curtains are actually pure linen tablecloths I bought on clearance at Wal-Mart about 5 years ago for $1.99 each (I'm so, so sorry little Chinese child who made you.  If it makes you feel better, I'm doing my part to put you out of a job now.)
The chair is a cast-off from my neighbor-- just like this one, but for $0 instead of,  you know, $2700.  Right now it's covered in a leftover slipcover cushion-cover (from another neighbor), but I plan to paint the frame black and have it reupholstered (by a pro) in a muslin with exposed tacks and extra-large nailhead (ala here) when I have the money.  The little cabinet, which used to be the top of a hutch, I think-- stuffed full of all kinds of yummy books-- was $20 at a thrift store, and will get a coat of "Talc" and a navy blue interior.  The mirror above is from Adelaide's, around $20, and will become navy blue, as well.  I'm planning to add a little coffe pot and some snacks to the cabinet.  I just threw what I passed on my way upstairs on top-- my Fenton glass and a little terrarium box (that needs a plant!)
The window seat is stocked with magazines, kids books and linens.  The curtains are more of those tablecloths.  Eventually a cute cushion and pillows are coming to the window seat.  AND-- I'm really stoked abou this-- the ugly carpet will come out and I can paint the existing (and badly damaged) hardwoods!  Grey? White? Stripes?  Thoughts? 

Thanks for indulging me in this loooong post.  I'm feeling so much better-- I caved and took both antibiotics and predensone (for a heat-related rash that had turned my hands into the ickiest glove-like mass of blisters you have ever seen.)  I try to treat myself at home as much as possible with natural stuff, but for this, I called in the big guns.  Just wish I'd done it last week.  And I'm delighted to report that Charlie-dog is home and ravenous-- must have been an odd doggie stomach bug.  He's so happy to be an only dog for the first time in 8 years that we wanted him to get to live long to enjoy it.
That tutorial?  It's comin'.  I promise.

Thursday, June 17, 2010

Friday: First Look

So this:

+ 2 coats of primer + 3 cans of spray paint +4 dollar a yard fabric + 5 full summer days with a teeny bit of sewing thrown in =

this! 
The first of my chair makeovers is complete, and it turned out better than I could have hoped. Stay tuned next week for a tutorial on how to make welting and reupholster seat cushions.  You'll never look at an ugly yard-sale-chair the same way again.

Have a wonderful weekend-- I'll select the winners of the giveaway at 5 pm tomorrow, and will post the winners here.   

Monday, June 14, 2010

Dresser transformation: Before and After

Here's a little peek into our master bedroom.


It's not a very large space, and our bed, which I love, takes up more than its fair share.  Storage is at a premium until we are able to do our remodel that we have planned (that's a couple of years off at this point) and I've been looking for a small dresser to help out with our storage needs.  A few weeks ago, while cruising my regular thrifting route, I found a cute little dresser with good lines-- with a massive mirror-- for $50. 
I decided to sleep on it-- and low and behold, when I returned the next day, the set had been marked down--50%!  So for $25 the dresser and mirror were mine. 

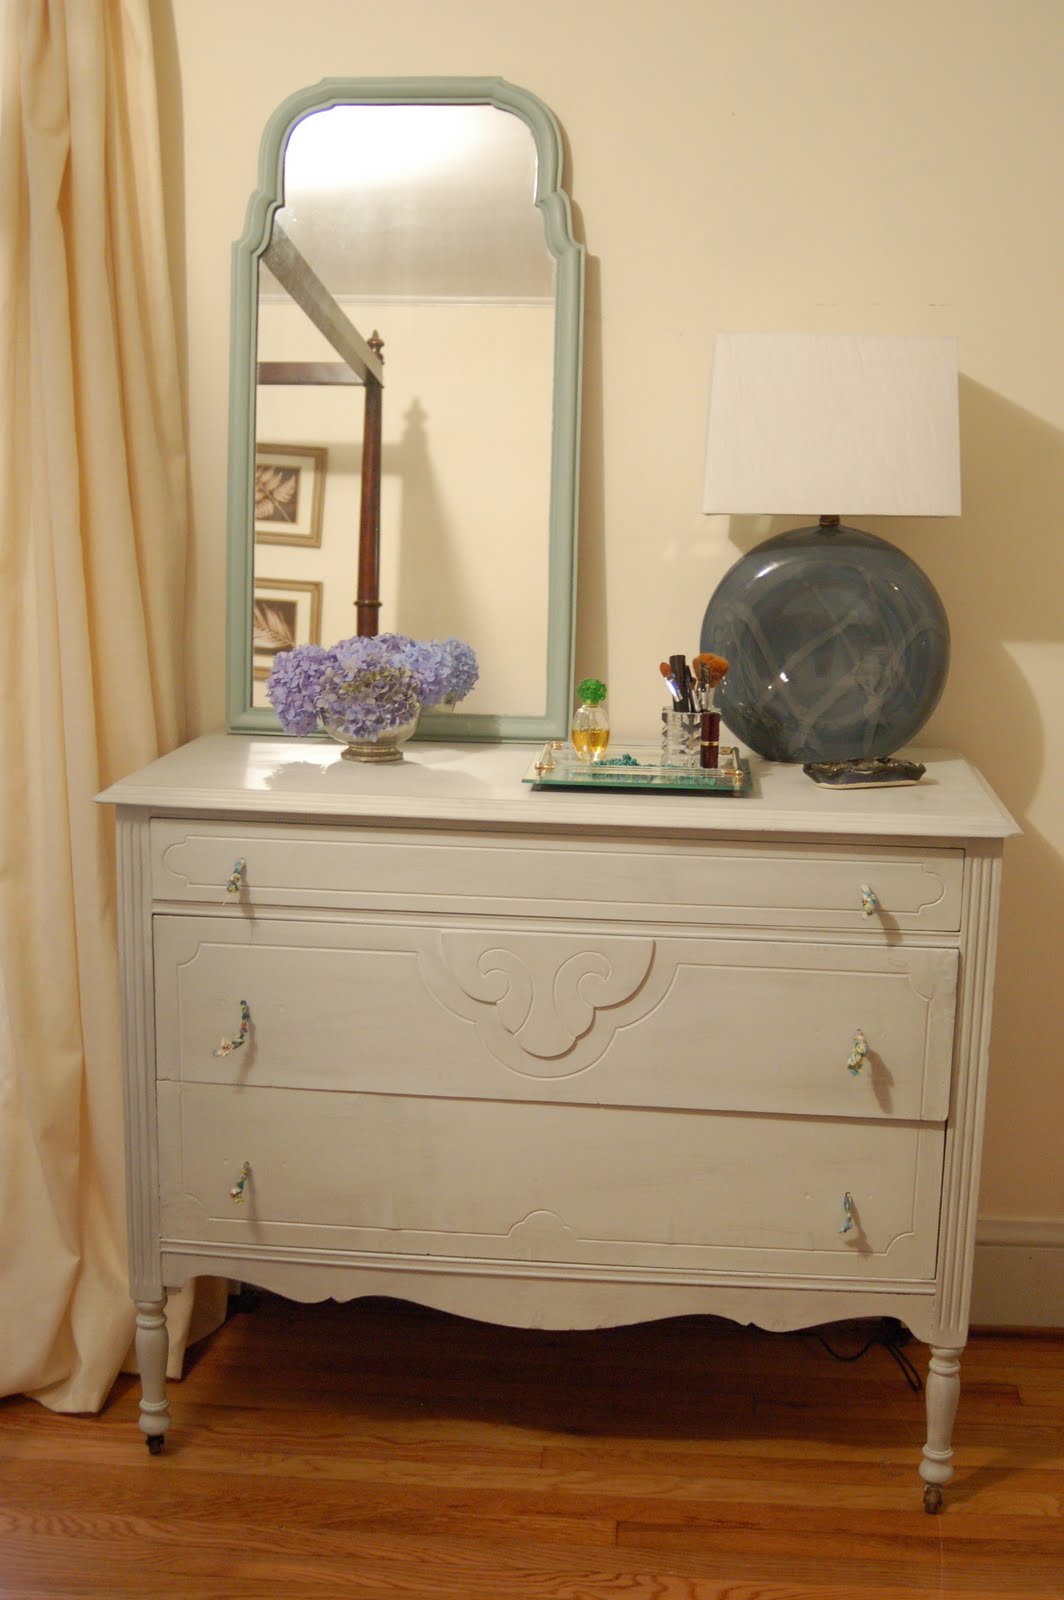
The mirror I put aside for another project-- I'm not a fan of matched dresser/mirror sets.  The dresser itself was lovely wood, but the veneer was in pretty bad shape, and so I knew it needed a coat of paint.  After a lot of woodfiller, sanding and priming, I was ready to brush on the first coat of paint.  I always stop at the "mistint" table when I'm at the hardware store, and I had picked up a couple of sample-sizes of paint--one in a very pale grey with green undertones, one in a medium toned grey-- for fifty cents each.
I decided to mix them together, and brushed on a few coats of the lighter mix using a wide brush-- I wanted the brush strokes to be present to provide texture for the next step.  Then, using a wide, dry brush, I went back and added a very light brushing of the darker grey to the entire surface.  Over that I added another barely-there dry-brushing of the original paint color, this time running against the grain.  A thin coat of wipe-on poly, a couple of new castors, and some improvised knotted fabric handles (just until I can get to Anthro without my kids-- these are NOT permanant!) and here it is!
Finished off with a thrifted mirror, lamp and tray, and it's a great little additon to our bedroom.  Here's how the numbers shake out: dresser/mirror $25, meaning the dresser itself was just $12.50.  Paint=$1.00.  Lamp ($8) plus new shade ($15)=$23, tray=$1.99, mirror=$10.00.  Grand total for a new dresser=$48.49-- I'm pleased!  Heck, six knobs from Anthropology will probably cost more than the entire project!

Don't forget the giveaway-- leave me a comment for a chance to win your scrap bag!

Monday, May 31, 2010

A Fireplace Makeover

The early 80's brought so much beauty into the world. 
Beautiful things like this:


Ah, Bowie.  And it just kept getting better.  Take a gander at this:

But wait.  It gets better still.

I see your Cyndi Lauper and raise you a fireplace.


My fireplace-- she's a beauty, ain't she?  Not only did the previous owners see fit to install this monstrosity using the cheapest possible bricks, they put it ON TOP OF the original fireplace, leaving the hearth exposed.  Yessireebob, they did.


Nice, huh.  And after three years of looking at this eye-searing monstrosity, I threw in the towel, bought a $17 gallon of Zinzer primer, and went to work.

There was discussion about keeping those beautiful brass doors.  Somehow they got all splattered with paint.  Hmmm.  They're by the curb right now if anybody wants them.  This is two coats of primer, and I think it will take at least one more, plus filling in the gaps where the doors were. 

Whew.  I'm soooo glad I've gotten this ball rolling!

Monday, May 24, 2010

The "Fireplace Room" gets a new name...

Remember the "before" of this room?

Welcome to the Library!  I've started the first phase of transforming the "Fireplace Room" into something with new purpose-- and a new name!  This step was mostly about gathering all of the furnishings in one place.  I still have a lot of painting to do--walls, fireplace bricks, a couple of pieces of furniture-- but the shell is there. 


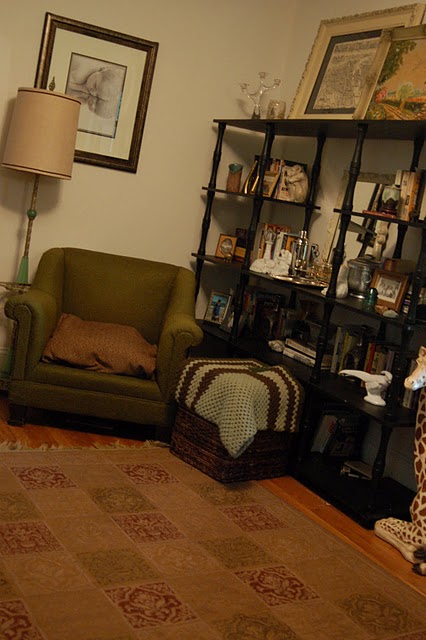
Here's a run-down of what is in there now.  The big bookshelf I scored at the Salvation Army-- I went back and primed it, and it got three more coats of chalkboard paint.  We have A LOT of books.  A lot.  I've pieced out our "pretty" books into some other places in the house, but this one is filled with all the books we love-pretty or not.  I've just started adding fun accessories-- little interesting bits collected on our travels, out thrifting, inherited from family.  I'm using the big open space in the middle as a bar area-- so fun for a nightcap in front of the fire this winter.


This cool chair-- a thrift store find many years ago, wearing that pristine green tweed when I found it.  A grand total of $25!  Unfortunately, my big Great Dane mix liked it a lot, too, and he ripped a hole in the seat cushion.  I've gotten some fabric to re-cover it for the time being-- it's wrapped around the cushion now.  More on that project to come!  I have some ideas for an accent pillow, too, but maybe one of these will go on sale and save me some work.


I used the green trellis fabric for the curtains-- it's upholstery-weight, and not the best for curtains, but we will see.  I spent $21 and 2 hours on them, so if I need to change them, so be it.  And there is my fake "Corrigan" chair off to the side.  I went with (gasp!) chalkboard paint-- after trying your suggestion of a chocolate brown (looked off in the room with all the black accents) and a sad, sad faux treatment in shades of gray.  I am never, ever, EVER doing a home upholstery job with leather again, is all I'm saying.  I'll be saving up to have this guy professionally recovered sometimes soon!

This has gotten pretty long-- I'll share more of the rest of the room this week.  The lighting in there is TERRIBLE-- almost no natural light gets in-- and it's making me nuts trying to get decent pictures.  Hopefully the sun will come out this week so I can get some better ones!

Monday, May 10, 2010

Living Room cabinet transformation: before and after

Remember this cabinet?
In all it's glory, huh?  This one was a real gem of a find--$30 at my local Salvation Army.  And quite the doozy to get home in my mini-van-- but where there's a will, there's a way and all that.  It spent a good long while sitting in the "fireplace room" looking attrociously ugly and embarassing me every time we had visitors.
 

I had intended for it to remain in the "fireplace room" which, I'm happy to report, is well on it's way to becoming a full-fledged library, which I love.  However, when this big guy came home, the spot in the living room I'd intended for him suddenly seemed-- well, smaller than when I'd measured it the first time.
 

Lucky for me my husband works long hours, giving me a little while to re-group before he walked in the door and did that deer in the headlights thing, which is usually followed by "what is THAT?" and I'm not sure what else because that's when I have a sudden fabric emergency in the studio and am unable to chat for a good long while. 

So after a little shuffling around, the cabinet found a home in this corner of our living room-- seen here before.

We removed the horrible hanging wall cabinet and had the wall re-plastered.  The desk found a home in the home of a friend... and tah-dah!

Better, huh?  I love, love the way it lightens this corner of the room.  If this chair is still available next week when I have time to pick it up (smile upon me, oh Gods of Craigslist!) I think it would look lovely in this corner. 

After priming with Zinzer primer (and yeah, it really is as great as everybody says it is) the exterior got two coats in a  Glidden high-gloss (why do I also never remember when I think "this paint is cheap!" that "this paint is a royal P.I.T.A. to work with!"?) called "Elegant Lace."  The interior is "Milk Pail" from the new Martha Stewart line for Home Depot in flat.  I bought one of their $2.97 test pots, and there was enough to give the interior two coats and a tall mirror for the living room two coats, with enough left for one more small project, bringing the grand total for this project to $46!

I emptied out my milk glass collection from the pantry, and grabbed a few other little curiosities from around the house to display in here with some of our books.  I'm going to check out Anthro for some hardware-- since I only need three pulls/handles, I'm hoping the sale bin will yield some treasure for me. 

But until then, one last look...